“The faintest ink is more powerful than the strongest memory.”
– Chinese Proverb
As mentioned in my intro post I read Getting Things Done (GTD) in 2008 and it changed the way I approached note taking and list making. Prior to GTD I kept lists and notes, but didn’t respect them. Whether it was a folder piece of printer paper or a legal pad, often the notes and lists were written, assumed committed to memory, and ignored. This was tolerable early in my career, but at that time I was starting to build complex software systems and often needed more time to finish the work. GTD was my first steps into proper long term note taking and to do lists.
But GTD wasn’t always a great fit for me and the nature of the lists kept getting more difficult. Clean up and resorting going through notebooks quicker as well as hiding what is needed.
I stumbled upon Bullet Journaling (BuJo) in 2016 and decided to give it a shot. I’m now on my third BuJo and love the system. What makes it work for me is how space efficient it is, and that I can quickly make up to do lists or brainstorm ideas without figuring out the best place to do that. I just open a new page and get started, noting it in my index.

Before getting into how I customized my BuJo system to my needs I recommend taking a look at the How to Bullet Journal created by Ryder Carroll. It will show you the basics and how to set up a simple BuJo.
Back? Great! Let’s dive in!
Setting up the Book
Currently I am using a graph “Project” notebook by Hallmark. It is 160 pages with a 1/4” graph paper. What I like best about it is the pen loop and rear interior pocket. These prove incredibly helpful in keeping my necessary supplies around my BuJo. They’ve held up to great abuse, and the form factor is just about perfect. Sadly Hallmark has discontinued these, but occasionally one will appear on a discount rack, where I will promptly snatch it up for my stockpile. I figure there are enough to last at least another year or two.
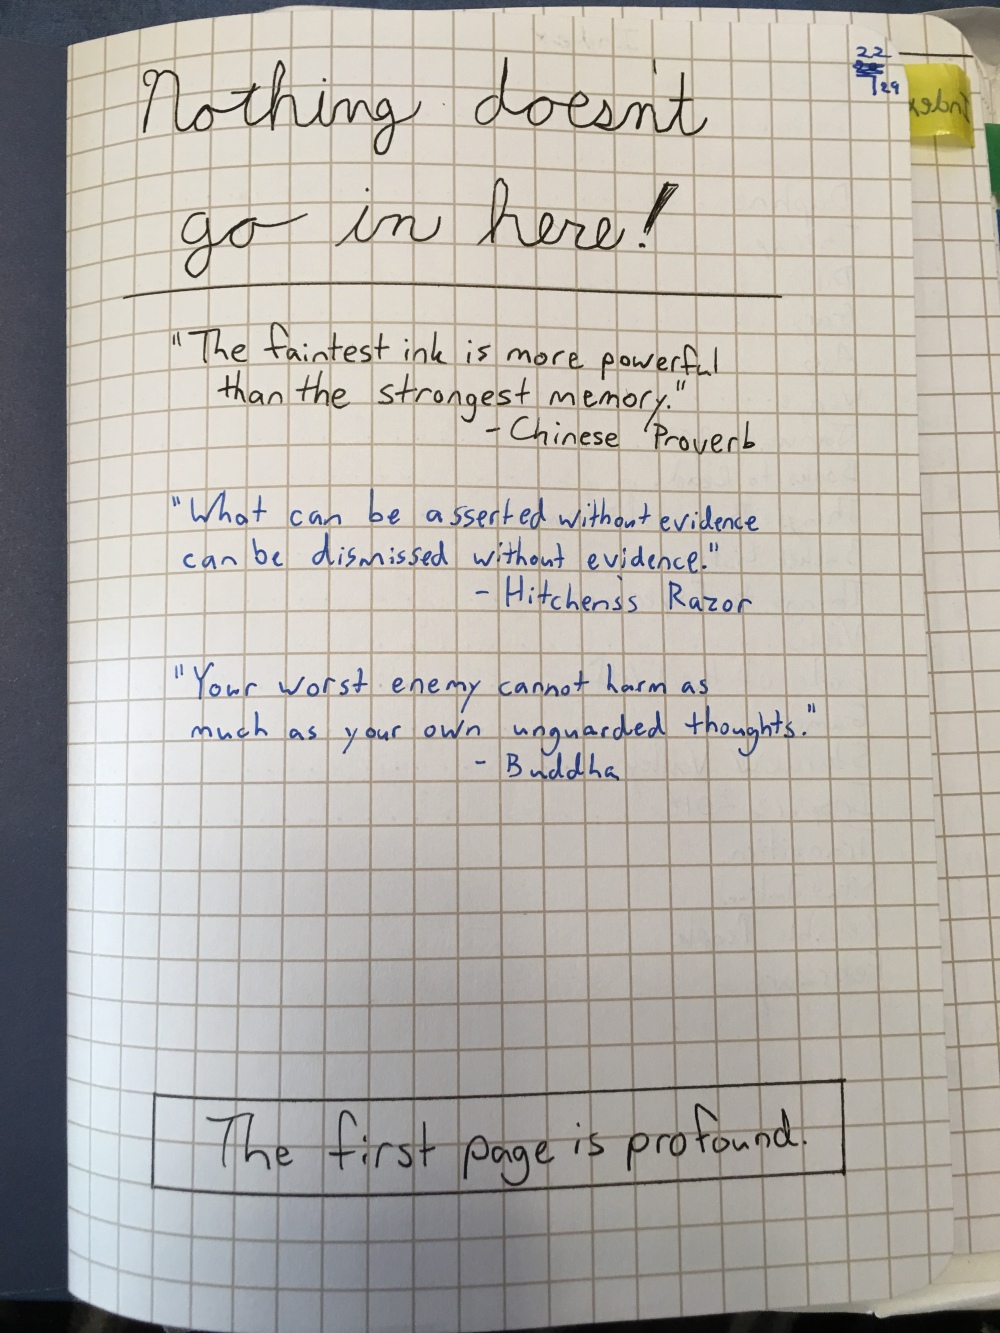
After taking the fresh journal off the self I immediately write, “The First page is profound” and “Nothing doesn’t go in here” on the first page of the book. This is a trick I picked up from Merlin Mann to overcome the writers block of a new notebook. The idea is that you mark up the new notebook immediately and with something incredibly insightful to get over all of these blank pages staring at you. So your drivel on page later on doesn’t matter.
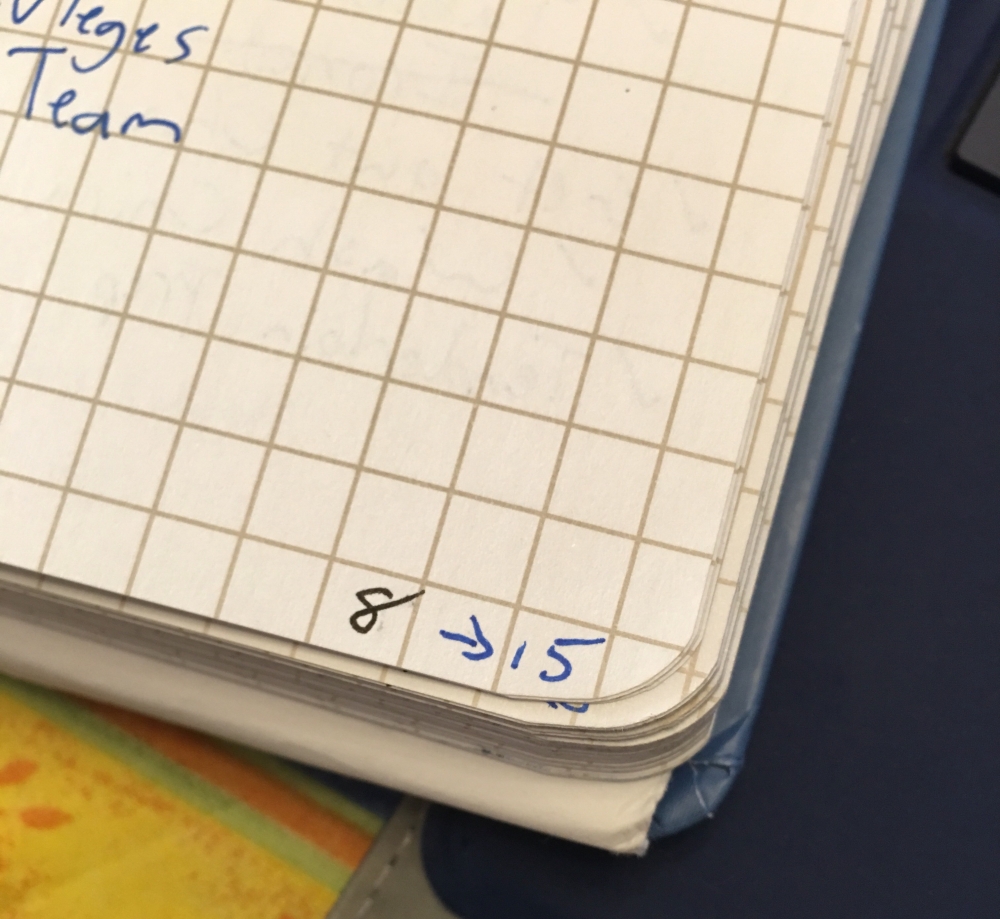
Next I number all the pages, bottom exterior corner second full square in. Placement is critical for tracking the different spreads (I’ll show how later in this post). Lastly I glue in a ribbon to act as my bookmark. I use a little crazy glue on the last two pages. It makes the pages less useful, but I don’t mind as I rarely get to every page anyway.
Once that is done comes the basic BuJo set up. I create my index page on pages 2 and 3. Then my future log on pages 4-7 with a monthly spread for the starting month on page 8 (note: A “spread” are the two pages currently opened to in the journal). For the future log I add monthly calendars, a touch that i often flip to and can show a date faster than those flipping around on their phones or tablets.
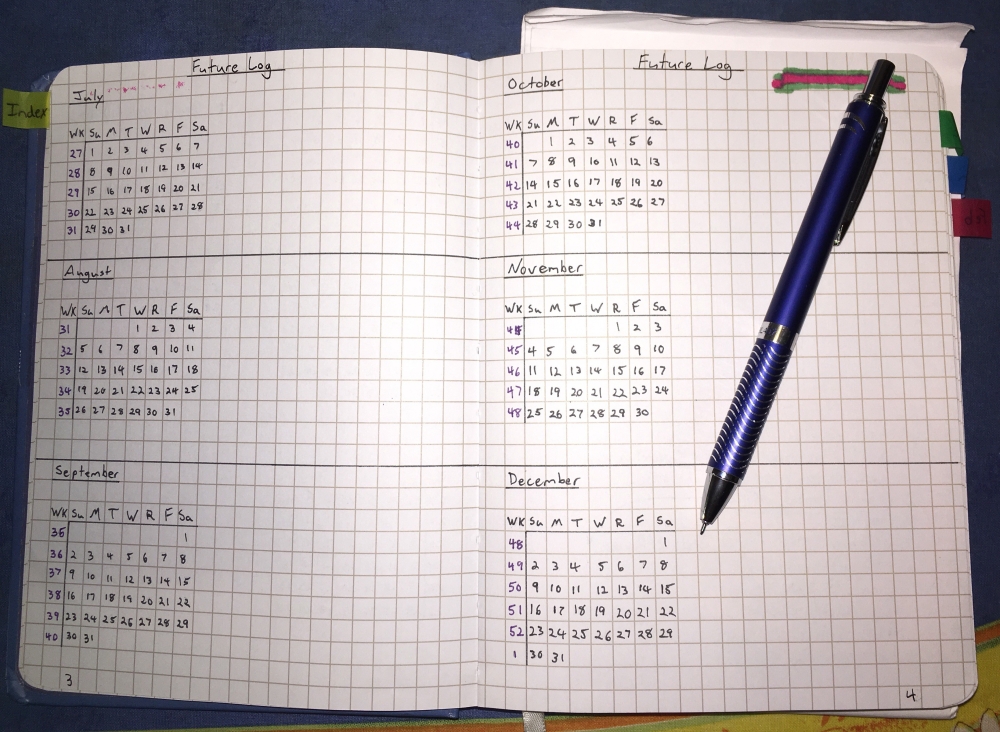
For my monthly spread I keep it pretty basic, like in David Carroll’s video above. In the past I have tried to make it look like a calendar along with other artistic flourishes. In the end it was just too hard to squeeze the information into the calendar and fancy layouts. So I keep it simple.
At this point the bullet Journal is ready to start my daily logging. I don’t get fancy by creating a weekly layout ahead of time. Trying that early on revealed some days produce fewer to do’s while single meetings could fill two pages! This variance prevents me from laying out my week in advance.
When these pages inevitably fill the current spread, I turn to the next pair of blank pages. Remember that spacing for my page numbers? Well this is where I use that extra space. I write the page number of the just filled spread to the left with an arrow pointing away from the current page number. Then I flip back to that finished spread and write the next spread’s page number with an arrow pointing away. Now I have an easy indicator to show where to quickly find the previous daily spreads throughout the book!
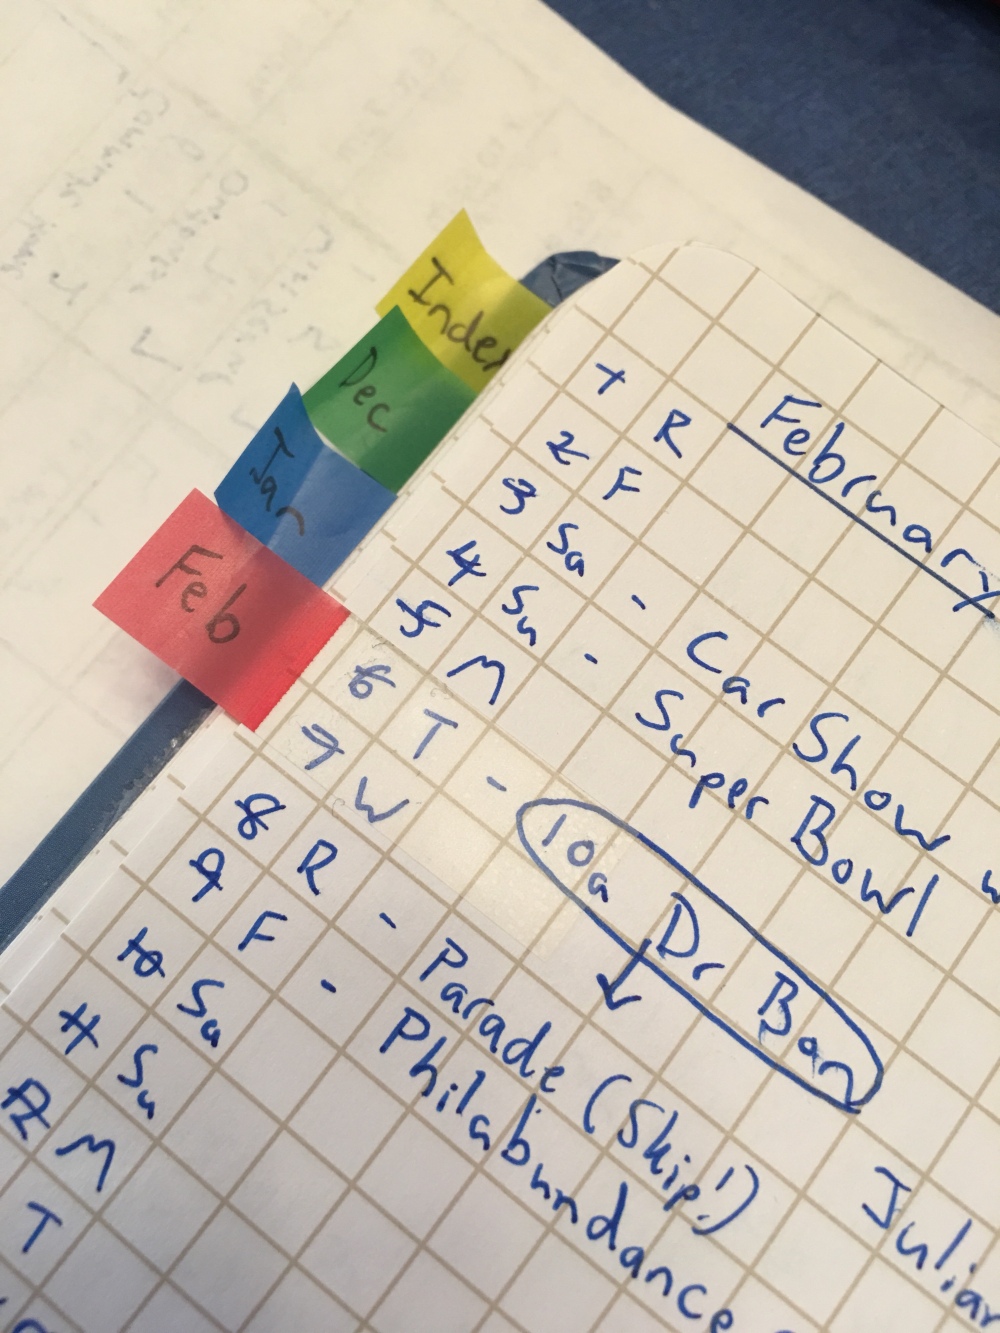
I use fresh spreads for specific projects, long meetings, or other tasks that should be grouped together. When I create those pages I copy their starting page number into my index. The index is really what makes the BuJo shine. Simply looking up the page number in the beginning of the book makes navigation so fast. I also help it along by using page markers on the Index and monthly spreads so I can hunt down a specific daily entry.
Then comes my special pages. These are spreads that I always include in my BuJo as I enjoy using them to track certain related items. In GTD there is the concept of the weekly review. A weekly review is when you go over your lists and prune and update tasks as needed. By reviewing your tasks weekly you see if there is anything left open, or brainstorm to see if there was anything that you need to add to your system. I use the following pages to keep me on track with my longer term plans that I would like to fulfill and review them weekly.
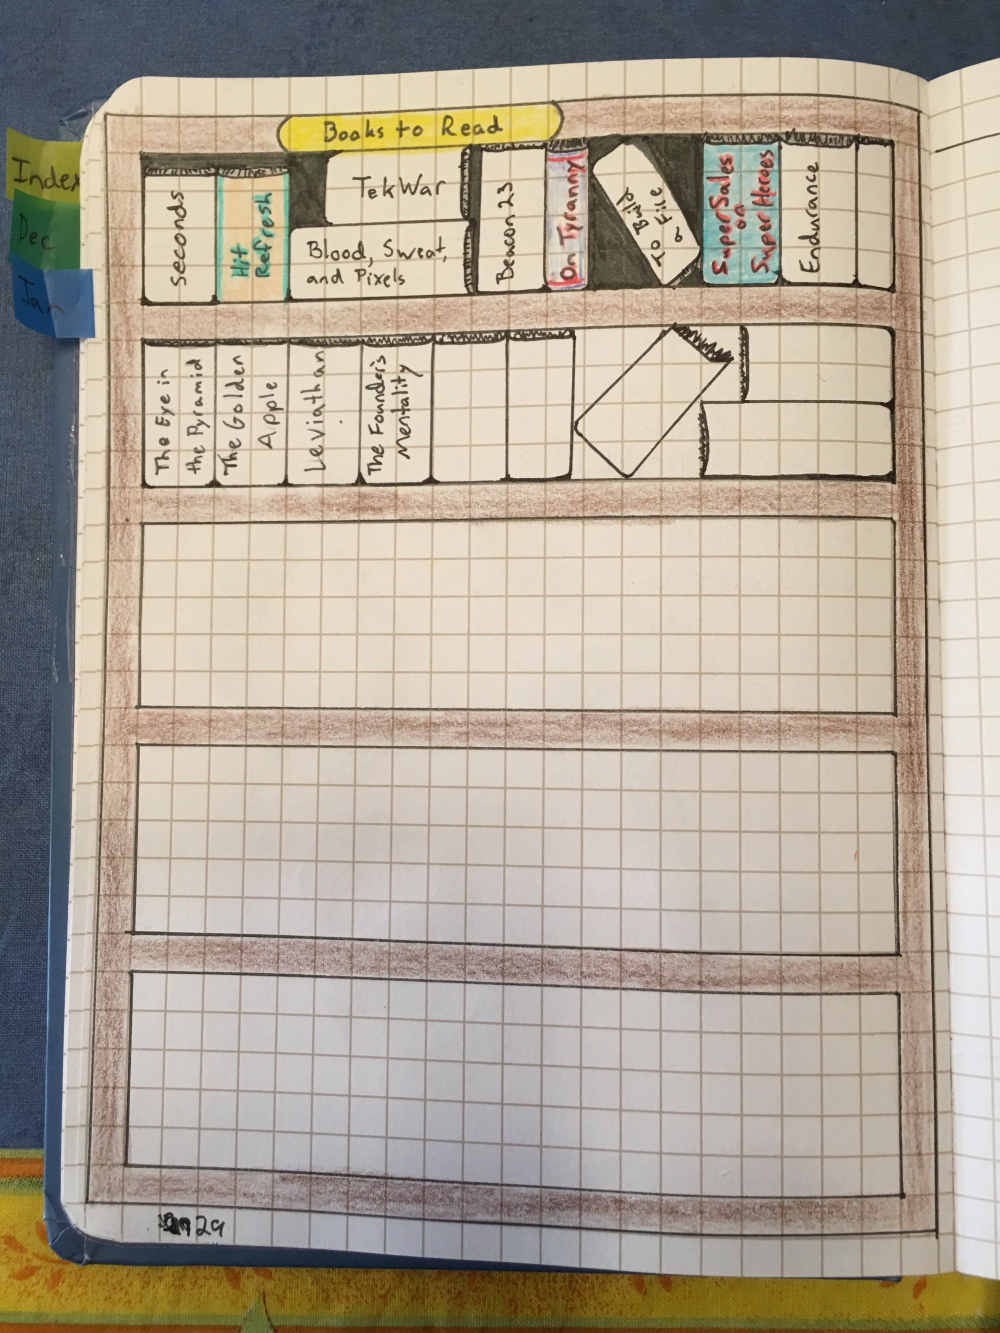
Books to Read
This is a stylized bookshelf where I write the titles for the books I want to get to. Once read I color them in, thereby keeping a living list of books read and those I want to get to. This idea originally came from Pinterest and I fell in love with the idea of having a book shelf always on hand. I never finish all the books here, but that is okay. I simply flush, or clear, the bookshelf when I migrate to a new BuJo and start again.
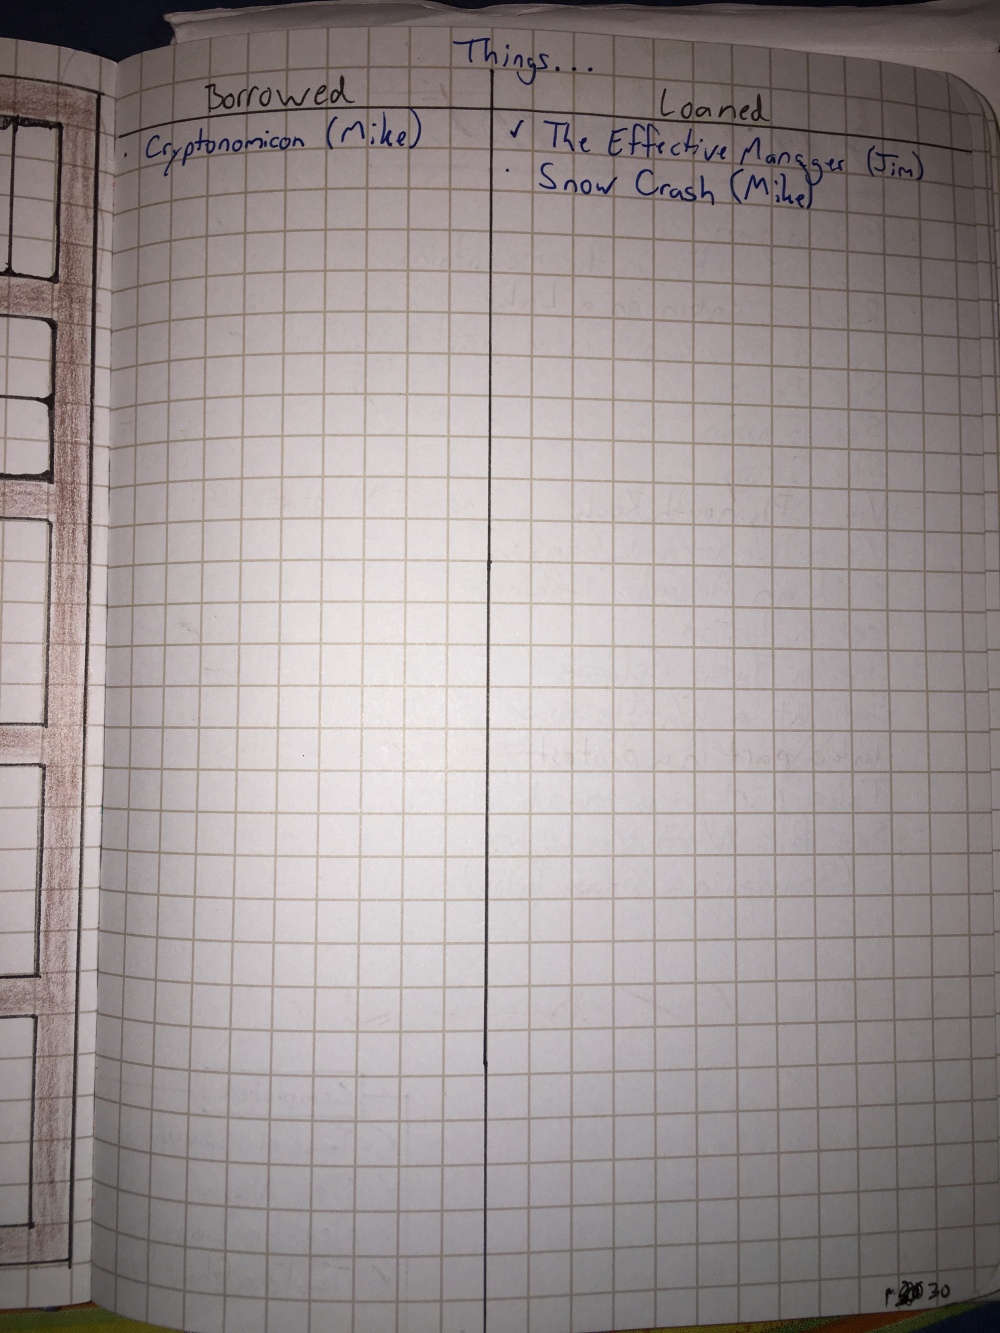
Things Borrowed/Things Loaned
This is a simple two column format used for tracking the things I’ve borrowed and things I’ve loaned out. I write the item borrowed or loaned next to a task bullet and the person from whom or to whom the item is associated with. I used to include the date, but stopped as it wasn’t that useful. Instead I use a signifier to indicate if the item is needed back urgently.
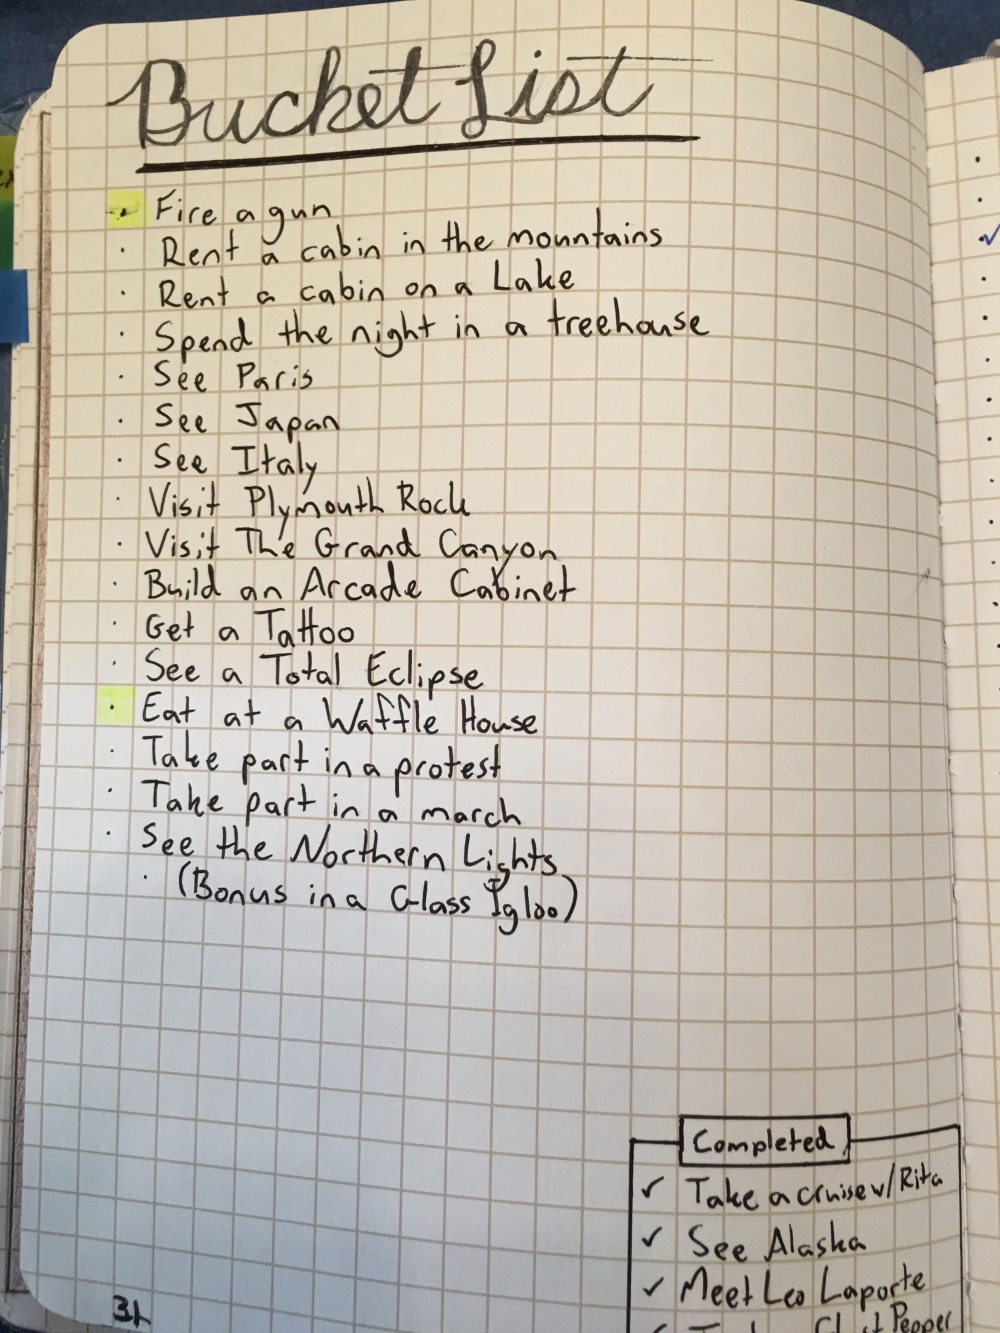
Bucket List
I have stylized this in the past, but the truth is it works much better as a simple list. Recently I have also started to record the items knocked off previous BuJo Bucket Lists as well.
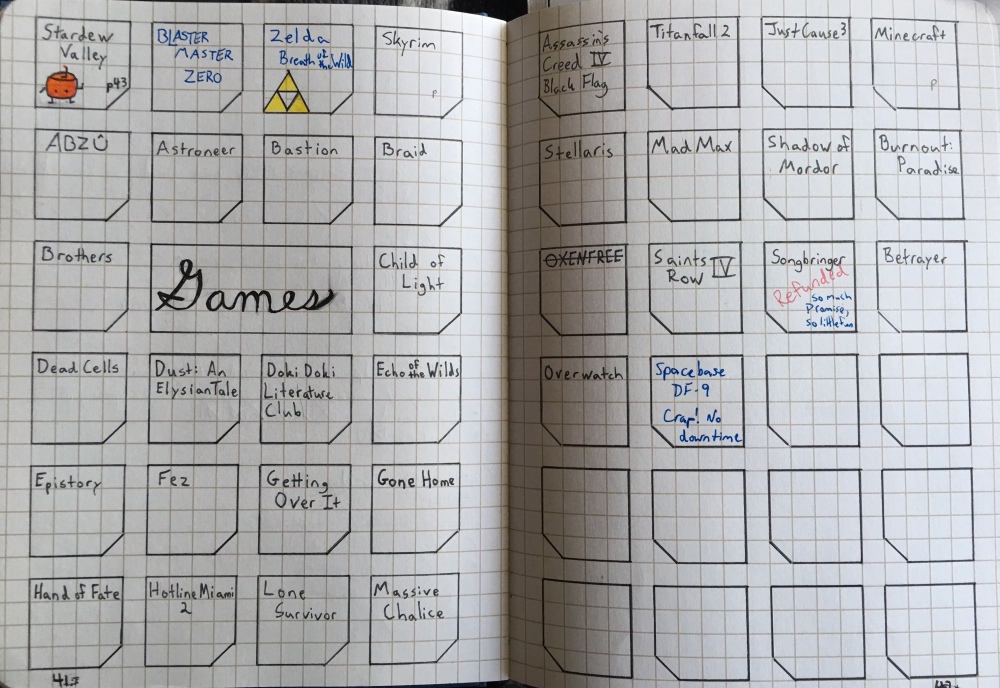
Games
I liked the bookshelf spread for my books so much that I started one up for games I wanted to play. A shelf didn’t seem right, so I came up with a NES cartridge inspired layout. These don’t get knocked off as easily as the books, so I simply write a comment on my feelings when I stopped with the game. Some games get their own spread and the associated page is linked to the game.
And there you have it. A quick tour through how I use the Bullet Journal system to keep track of things. Next time I’ll go a little more into depth on how I use the daily spreads, how I set up my project spreads, and what tools I use.
